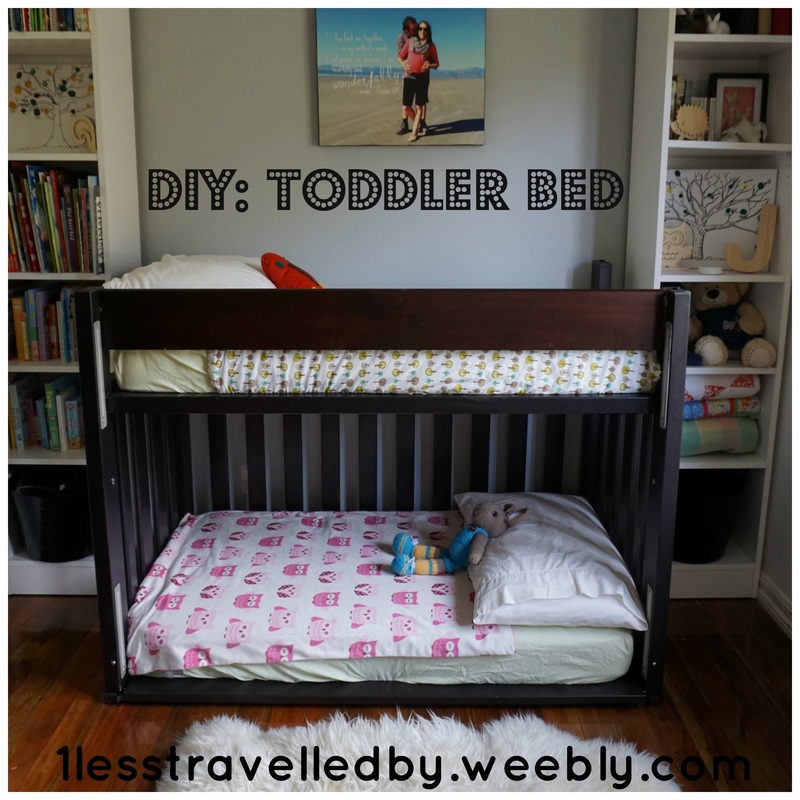
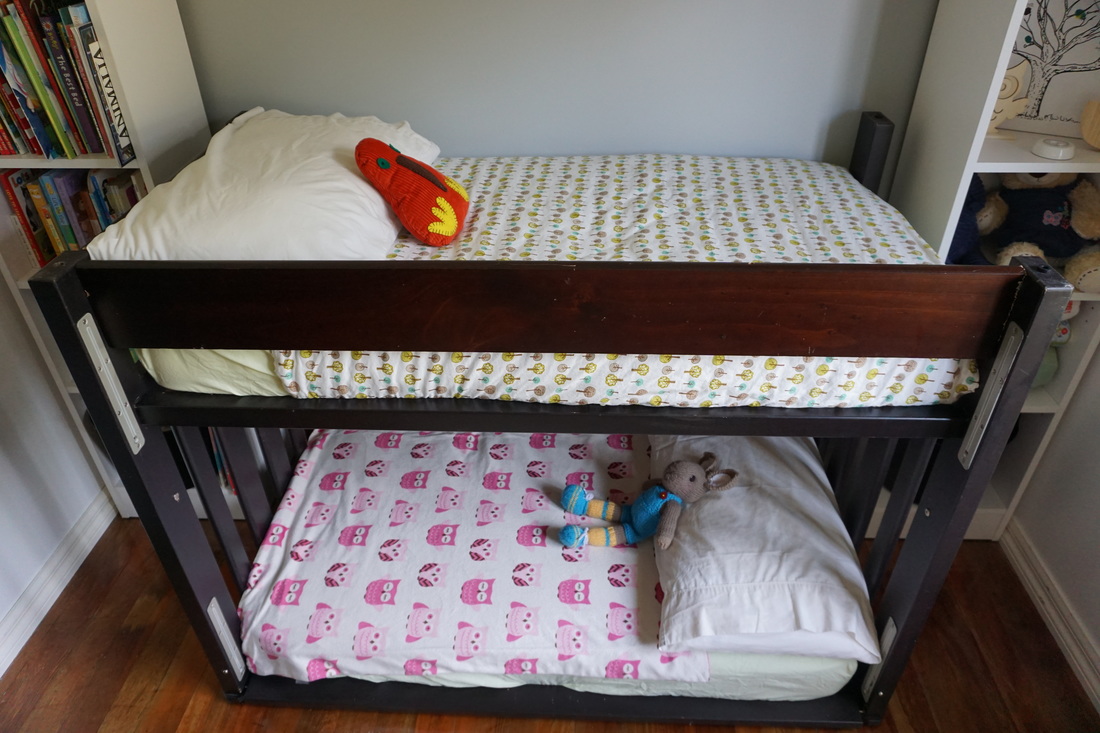
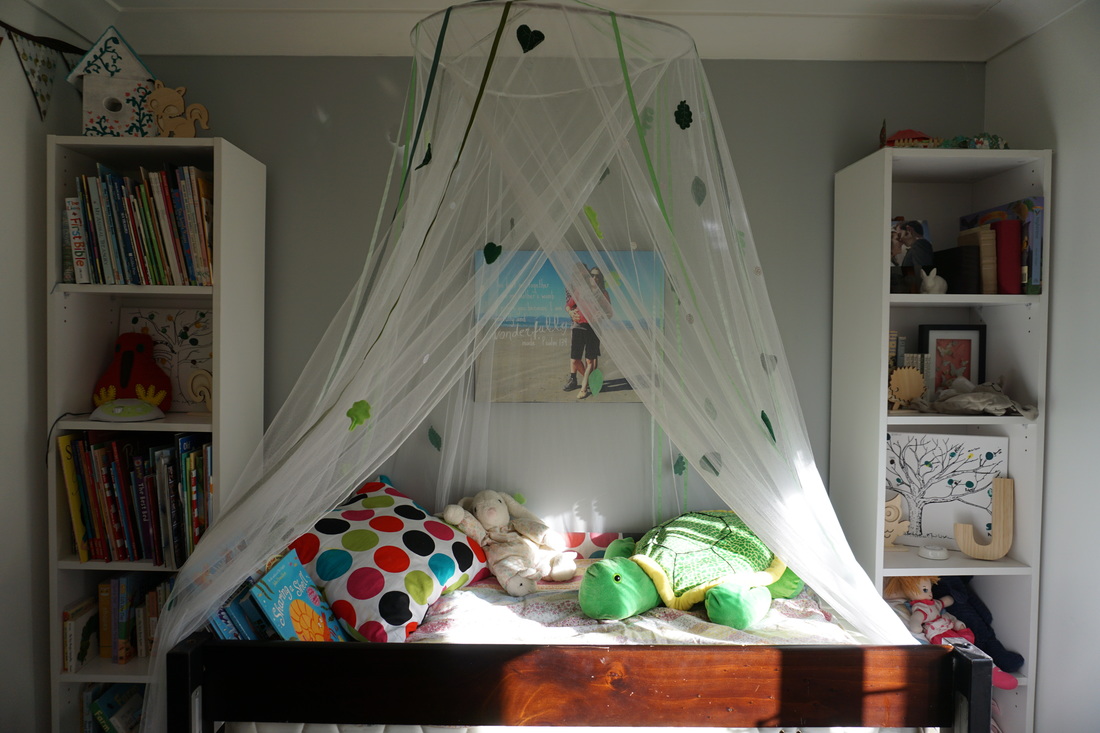
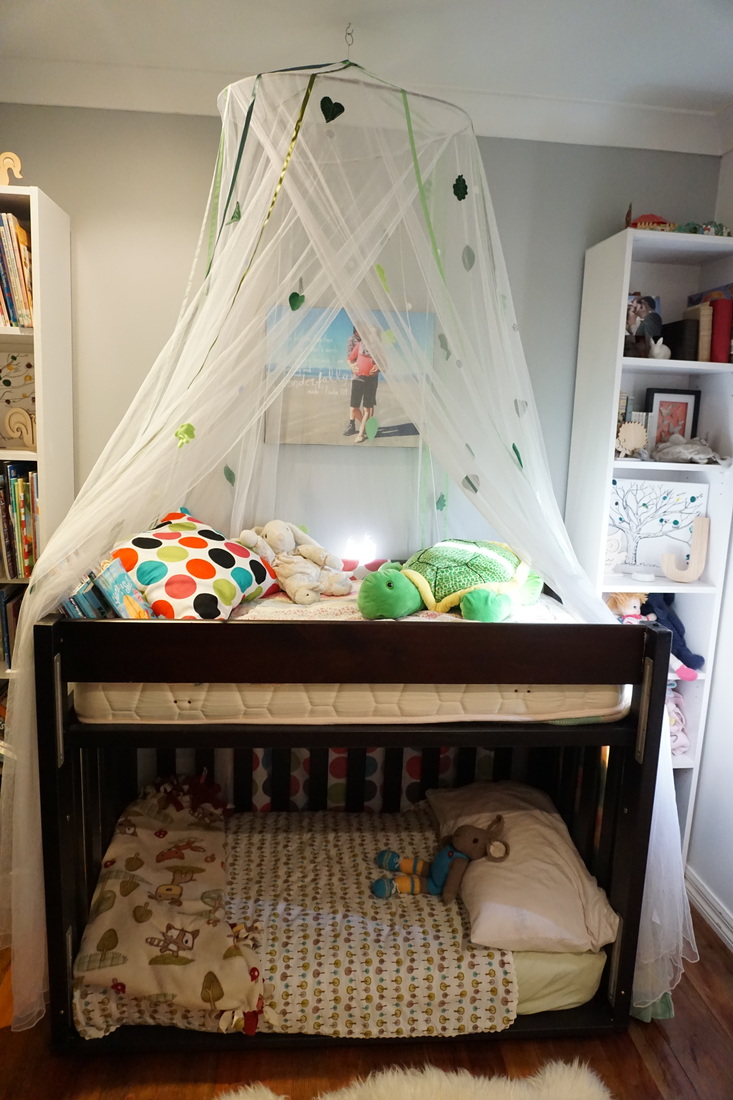
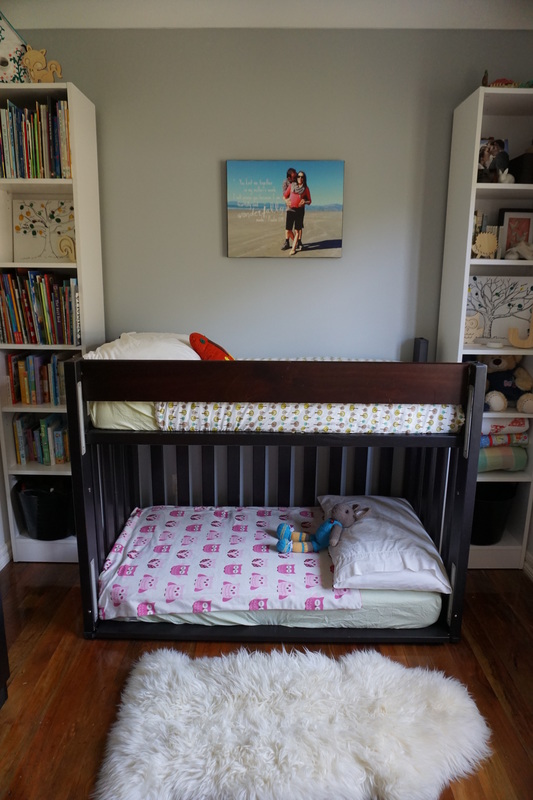
  Pinterest can be my greatest asset or my worst enemy. In this case, I feel pretty pleased with my pinterest inspiration for my toddler's bed. A few months back I decided it was time to get rid of the cot (crib). We were away on holiday and a mattress on the floor was the best option. When we arrived back home, I decided to remove the rail of Miss J's cot (crib) and transition her into a "toddler" style bed. Her room is very tiny and I couldn't bear the thought of putting a single bed in it's place, as it would basically be just that - a bedroom and no room for anything else. I thought about buying a toddler sized bed or even a toddler sized bunk bed. The builder's quote was $800. Ya, nah! Back to the drawing board... aka pinterest. How could I make her cot (crib) look more like a bed? By turning it upside down of course!!!!!! So I did just that. I removed one rail, turned the cot upside down, added a mattress and hubby installed a rail. Now Miss J has her very own toddler sized bunk bed. Perfect for those summer family sleepovers or for her very own reading loft. The bed is very stable. So stable, mummy can lay on the top. Total cost: $40 for a secondhand lightly used mattress. We had the wood for the rail already as it came from another bed we cut down from a queen to a double. I call that an economical and functional venture. Good thing it looks cute and our little one LOVES her bed.
3 Comments
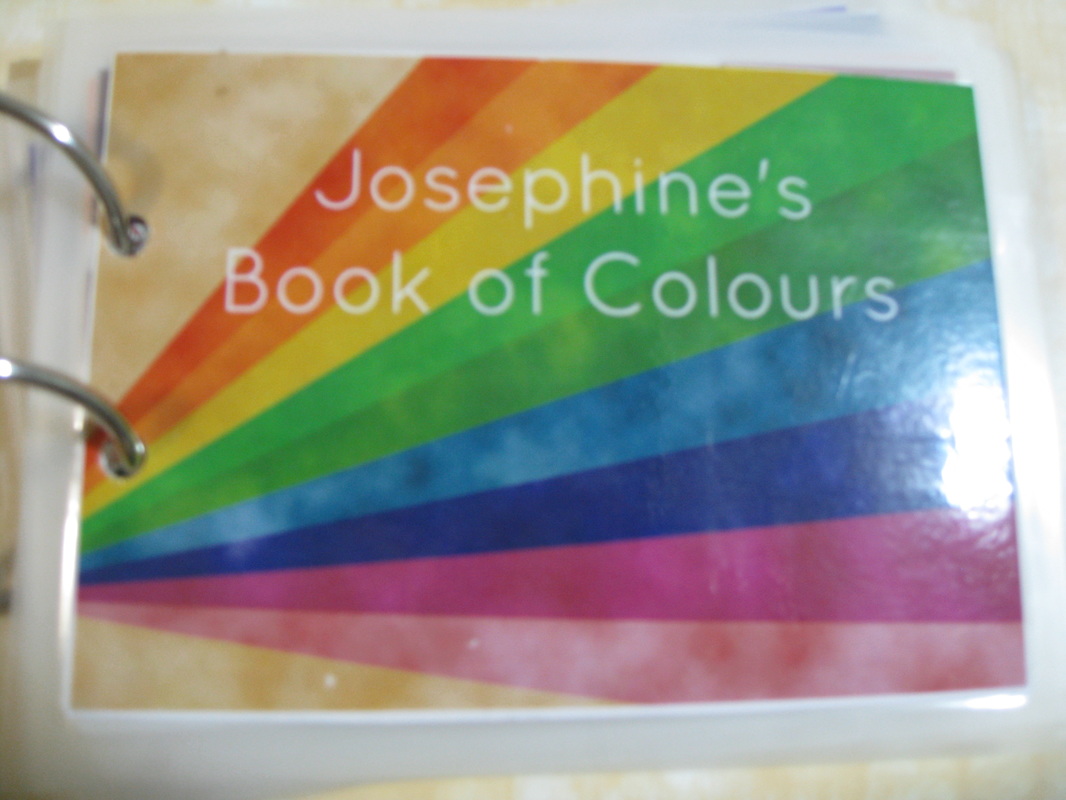
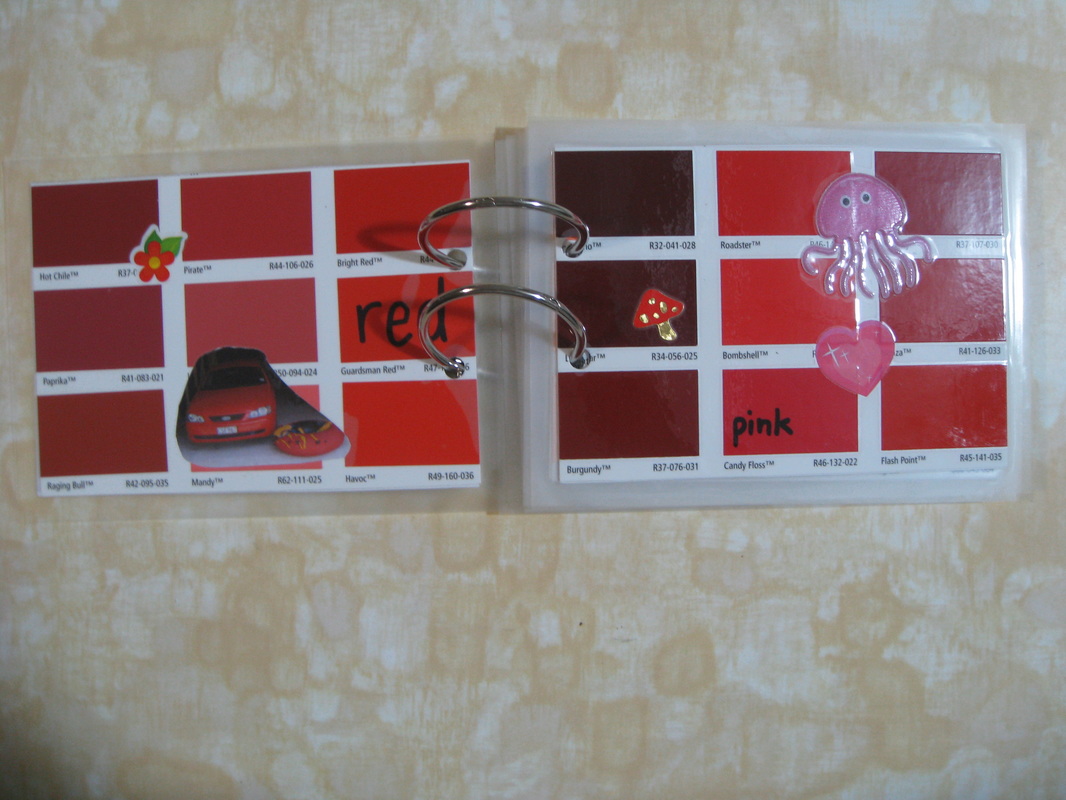
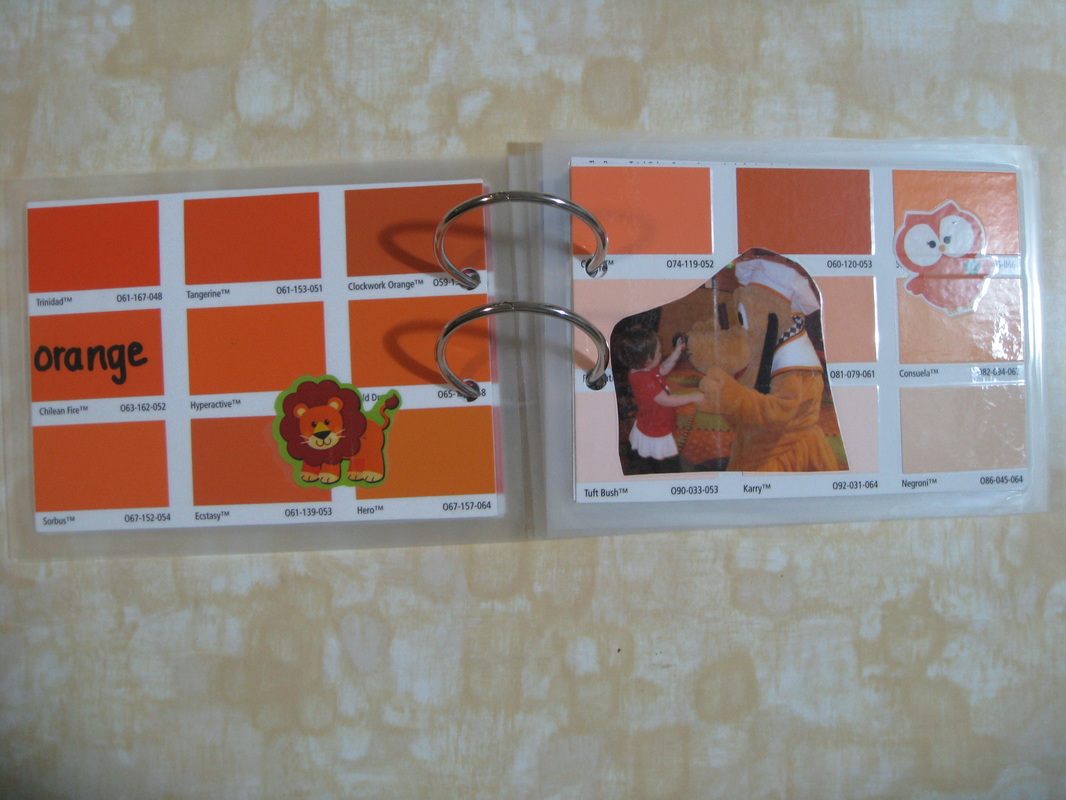
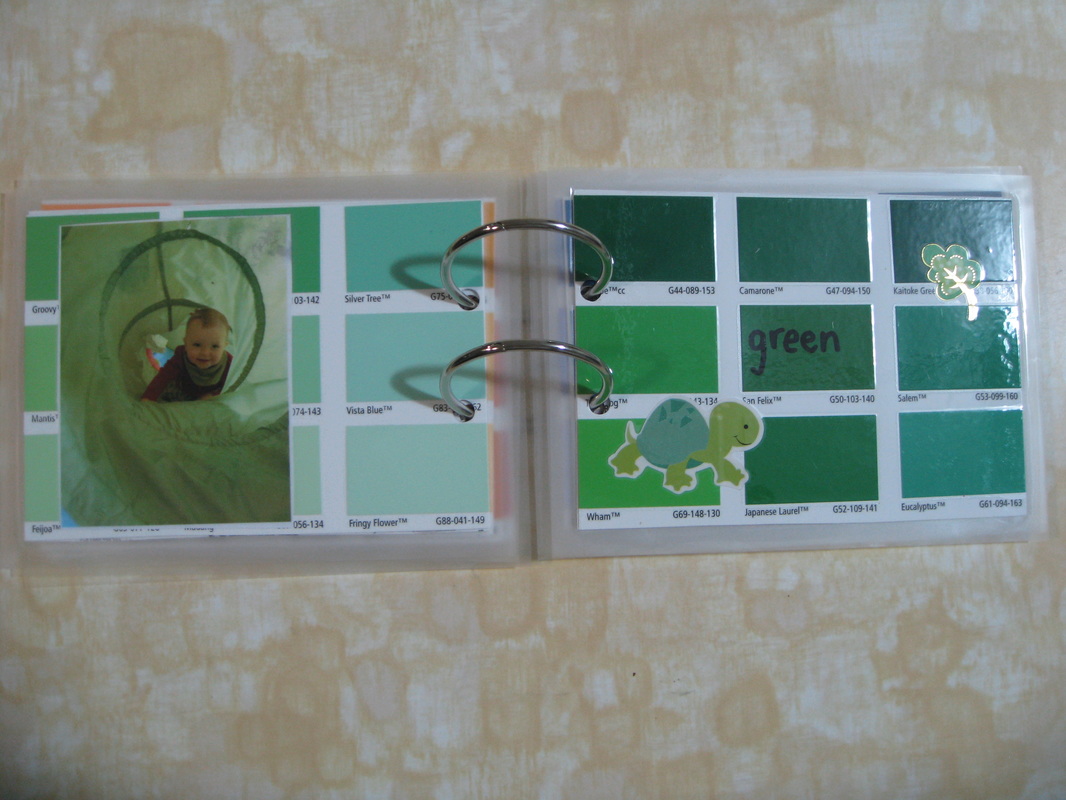
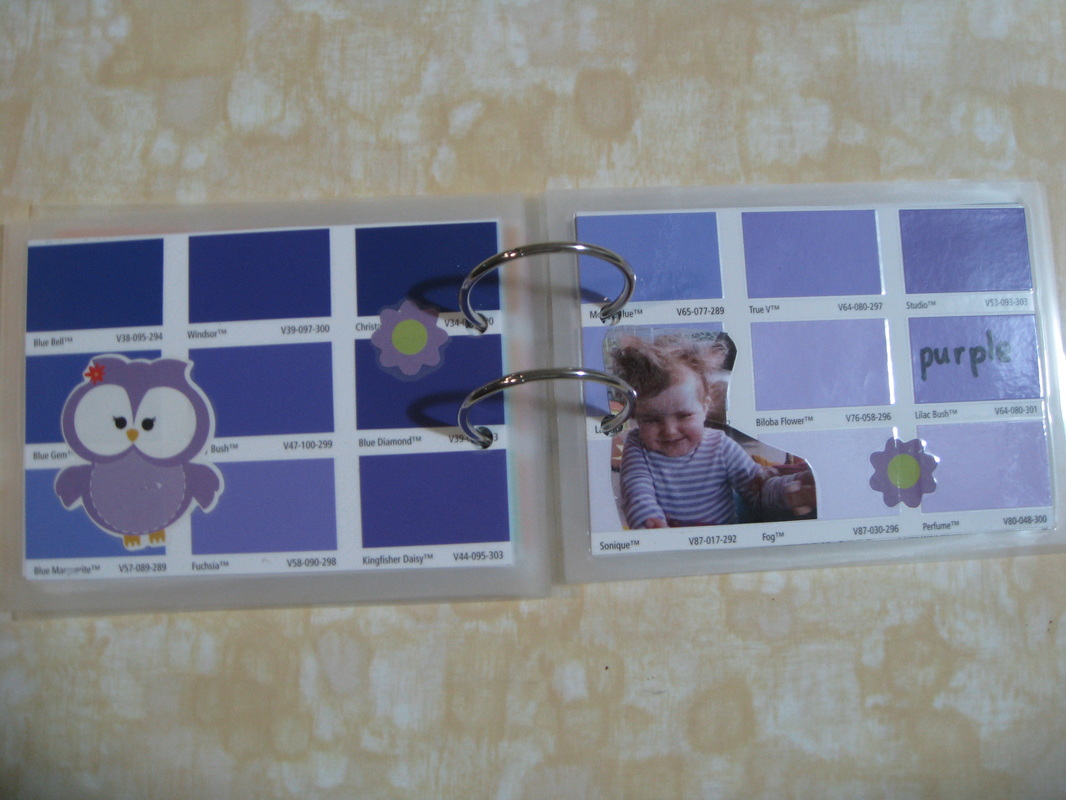
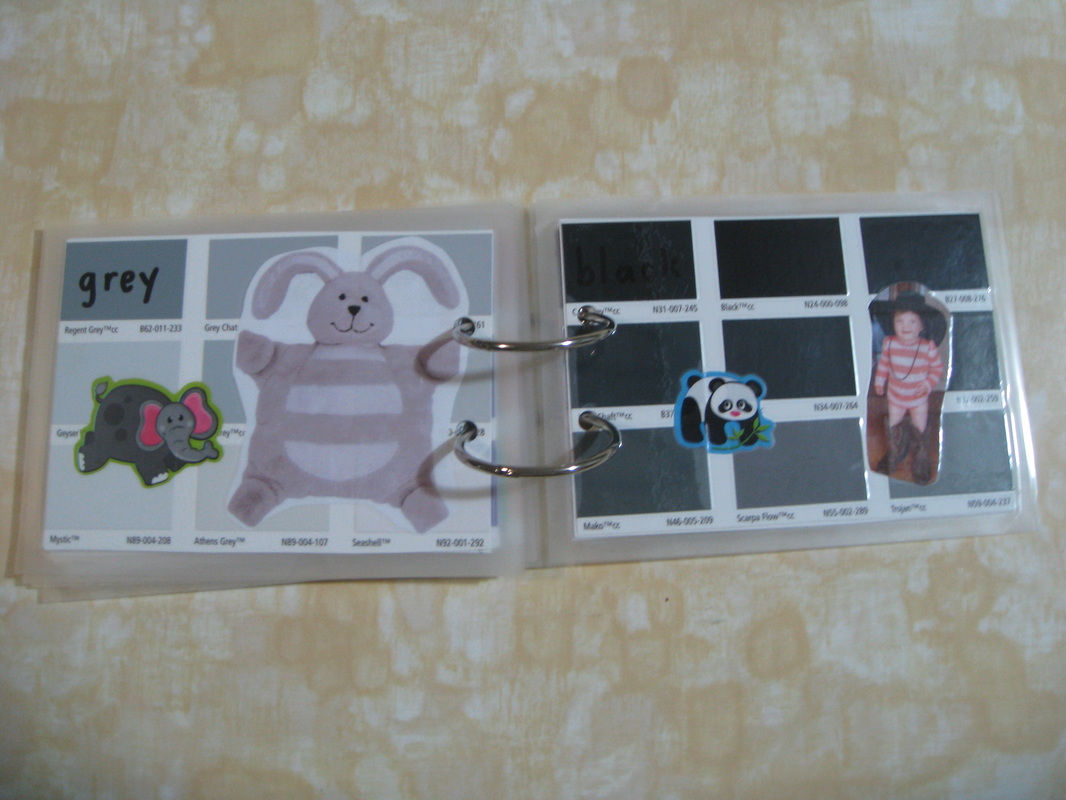
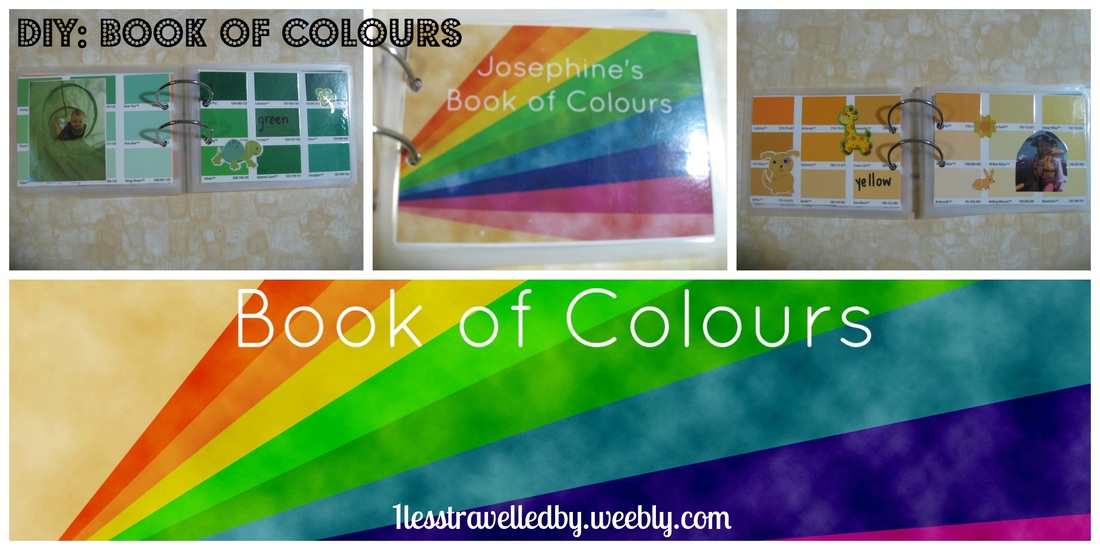 Learning colours comes naturally for most people, but who wouldn't love their very own personalised Book of Colours. This was a 2 hour project in total from gathering the supplies, putting it together, and laminating the project. I basically followed the tutorial on this page http://www.teacherbytrademotherbynature.com/2015/08/diy-homemade-colour-book_7.html and here https://craftulate.com/2013/03/homemade-colour-book.html, but made a few small changes to suit J. Supplies: Paint swatches (two of each colour) from Mitre 10 (FREE) A meaningful photo to your child in each colour you include in the book. A range of stickers ( we had these at home) Book Binding Rings (x2) Hole punch Glue Laminator/laminating sheets (optional) - I took the pages to the Warehouse Stationary and they laminated, cut and whole punched for $8. I collected one large Resene paint swatch in each of the colours I wanted (pictured below): Red/Pink Orange Yellow Green Blue (not pictured) Purple Grey/Black Brown (I may add white later) 1. Cut the cards in half and glue them together so that they form a book with the matching colours facing each other. 2. Add stickers and a photo to each colour and write in the colour name. 3. Laminate. 4. Punch and ring. Ta-da! A personalised book of colours. I think they key element for J is that she sees all the things that are important to her in the pictures and connects her prior knowledge to the colours she is learning.
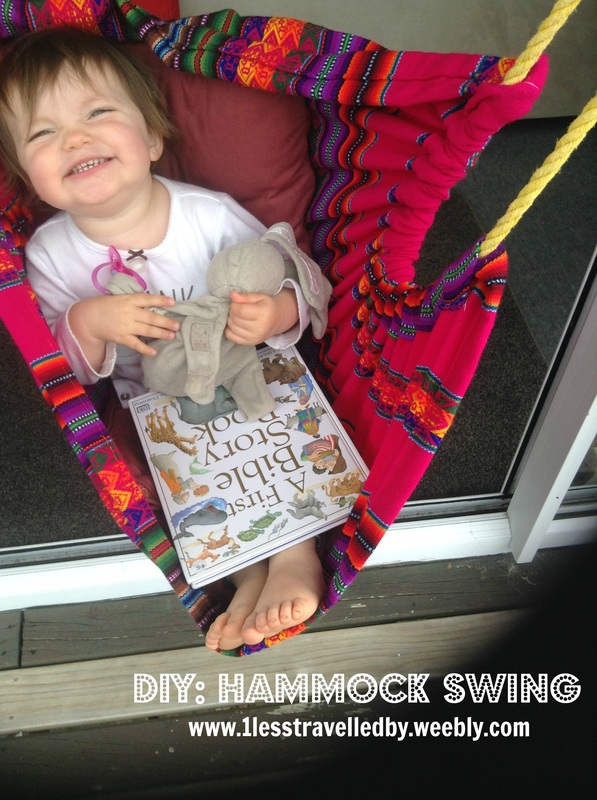
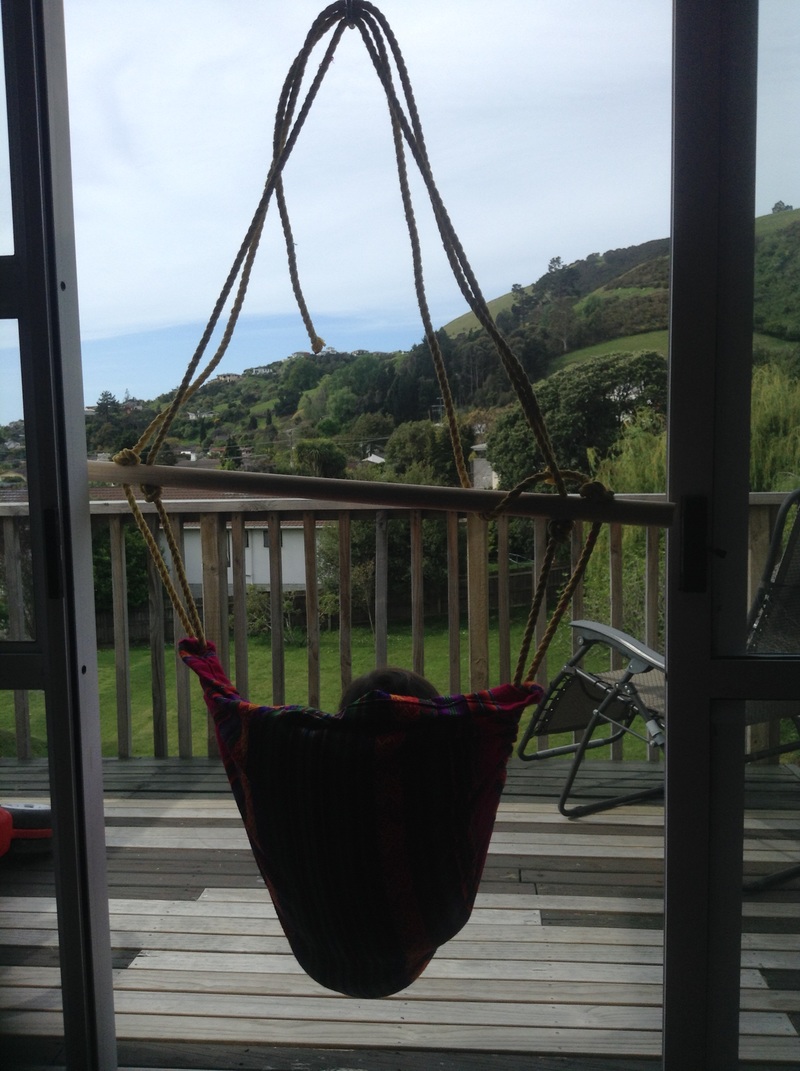
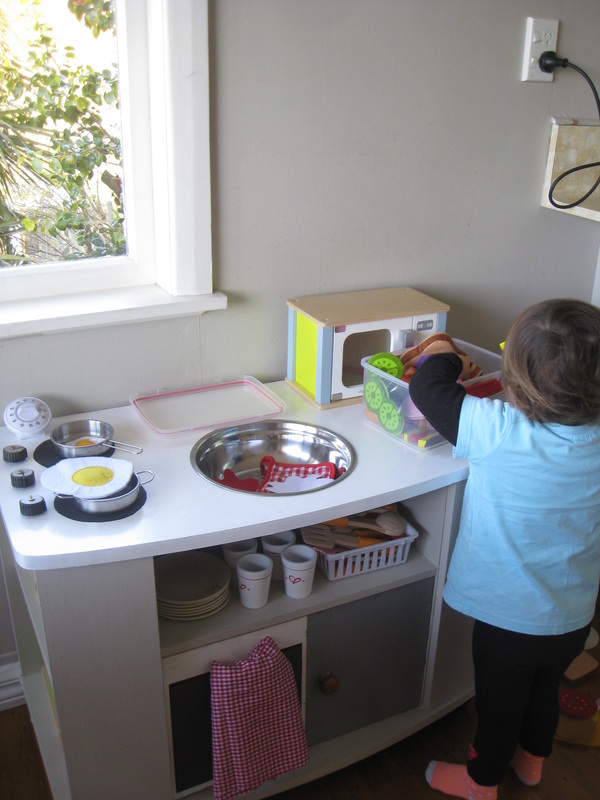
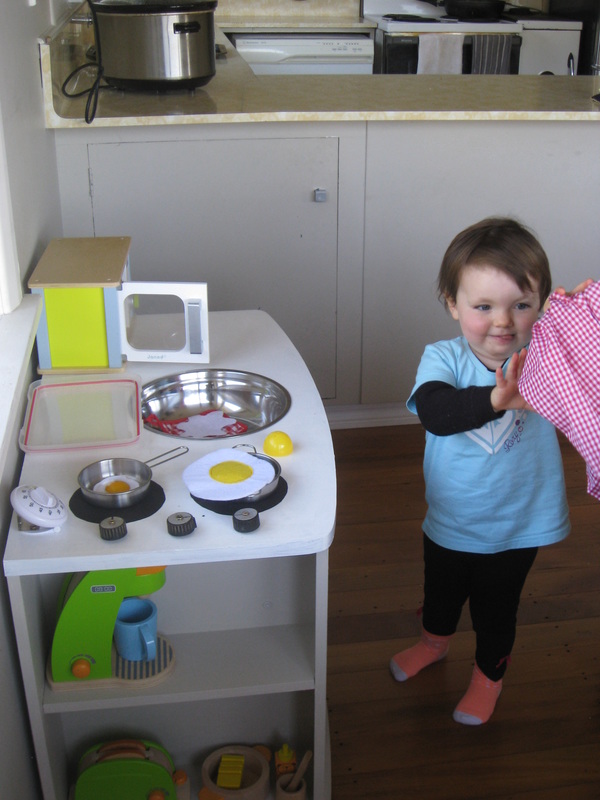
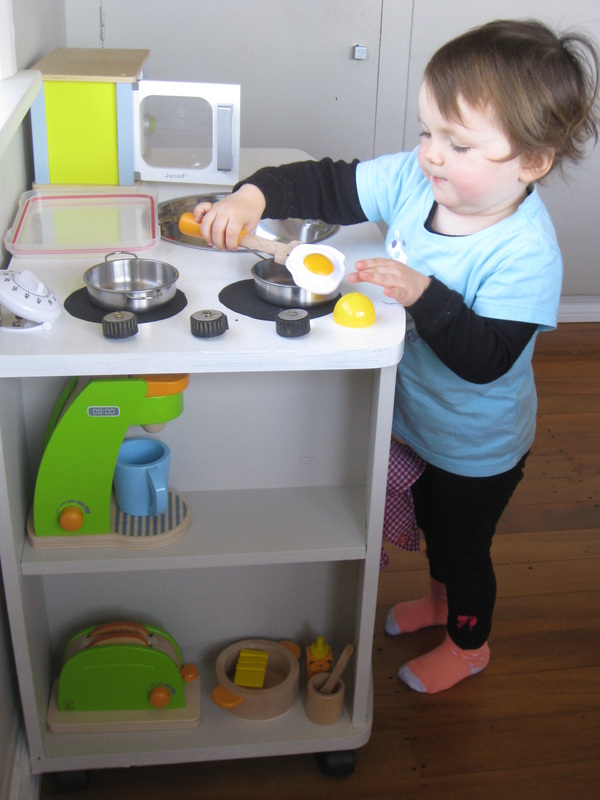
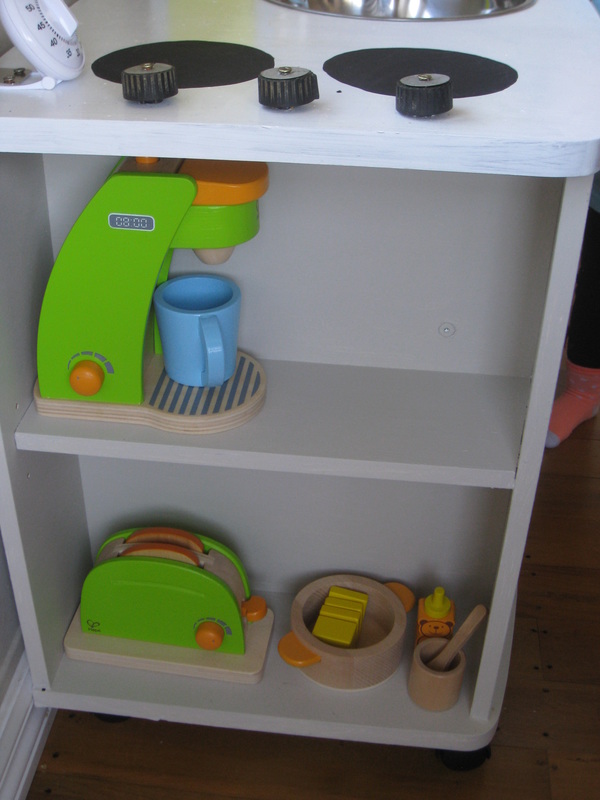
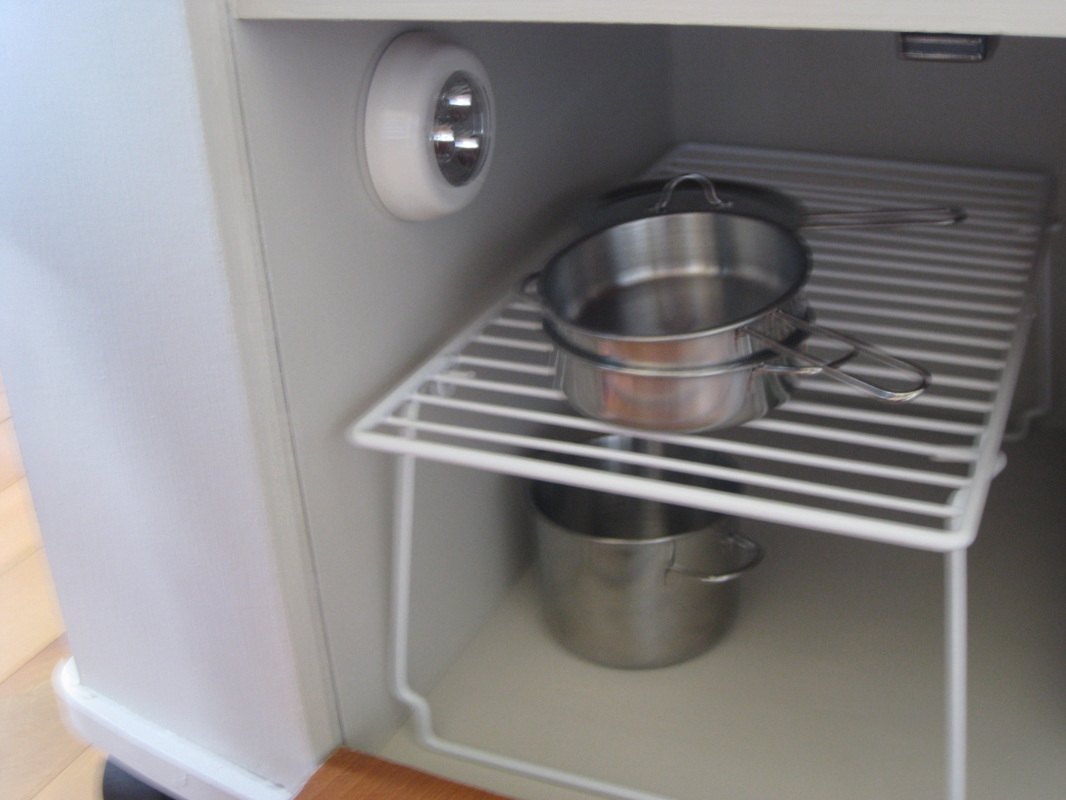
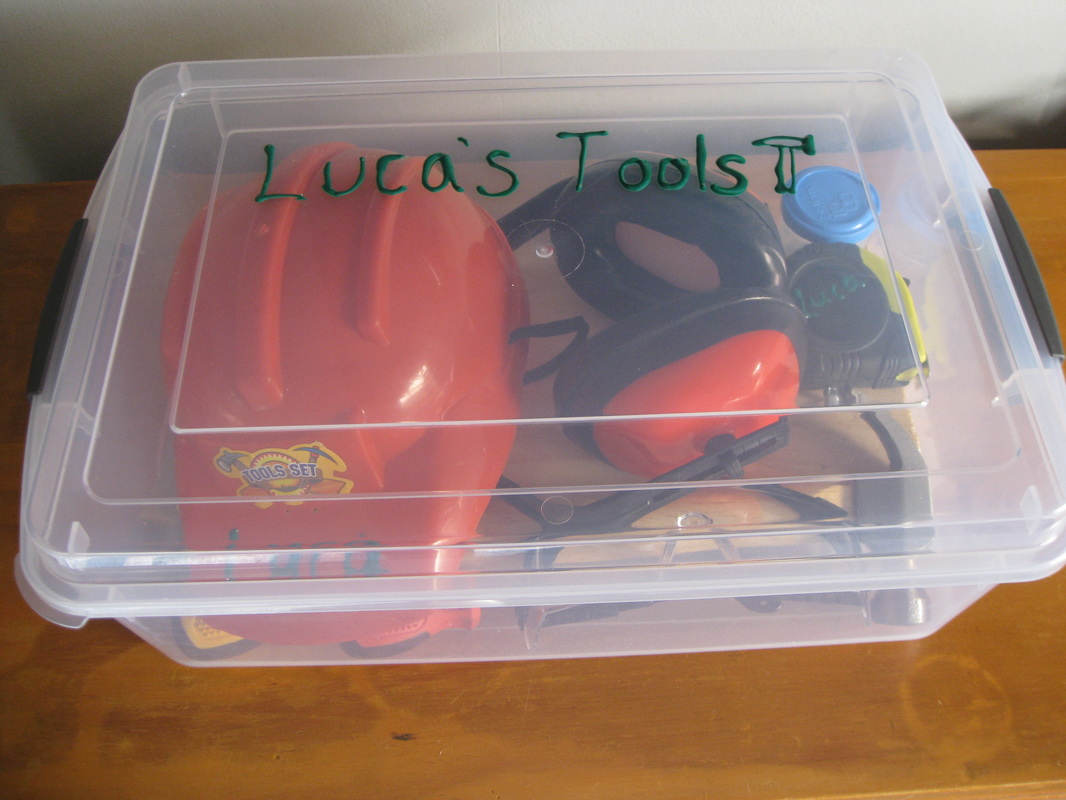
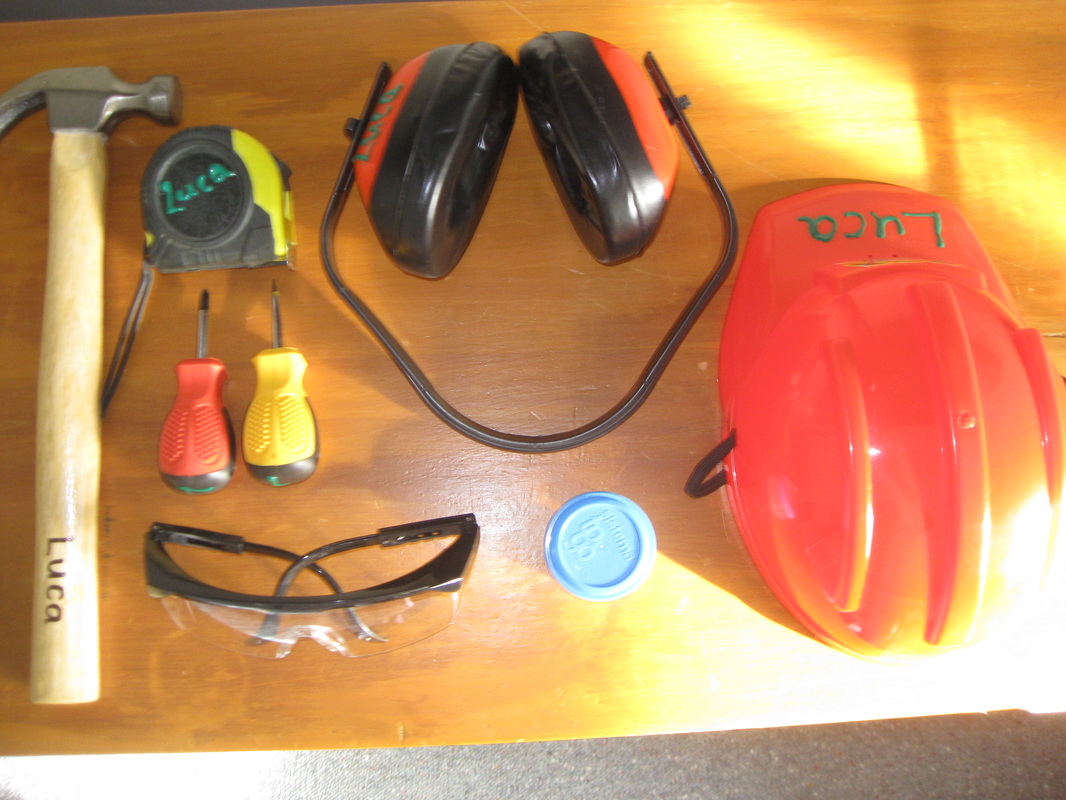
J loves to do many things, but her two all time favourites at the moment are reading books and swinging. I had a beautiful Peruvian woven wrap gifted to me and I wanted to make something cool with it. I did a bit of googling and found a great tutorial http://www.abeautifulmess.com/2014/06/hammock-chair-diy.html. I borrowed a sewing machine and whipped this little swing seat up in one night. I made it ages ago, but she is just getting into it. 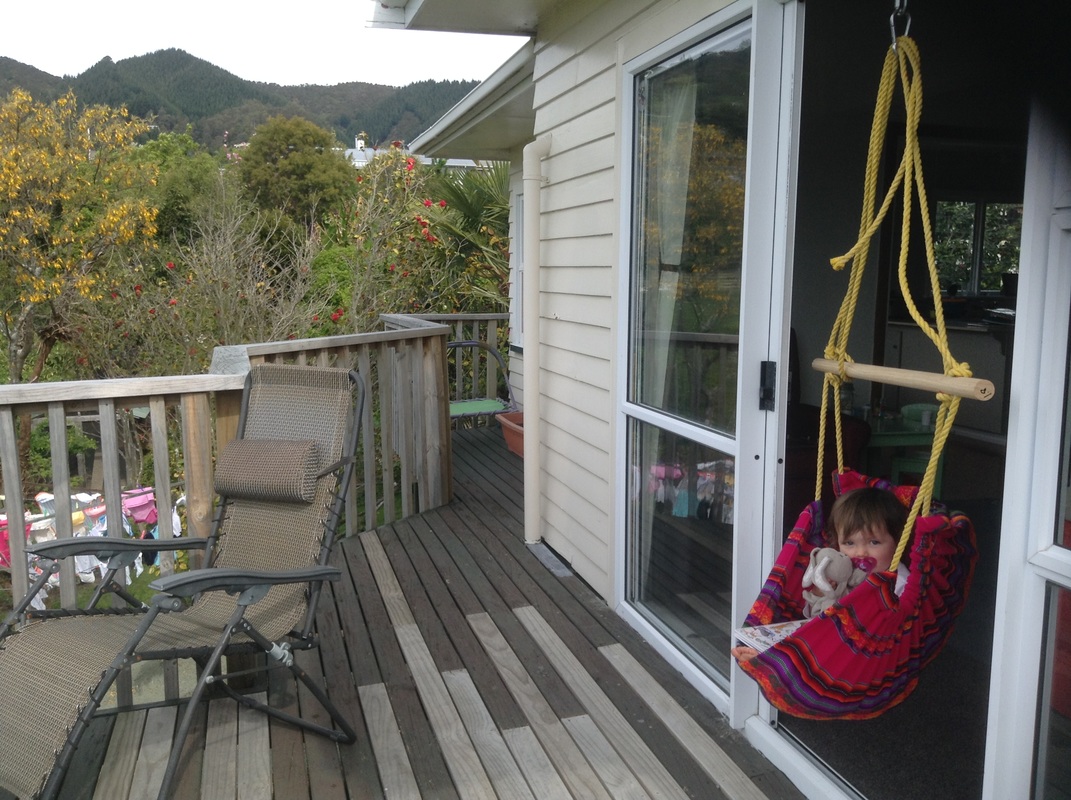 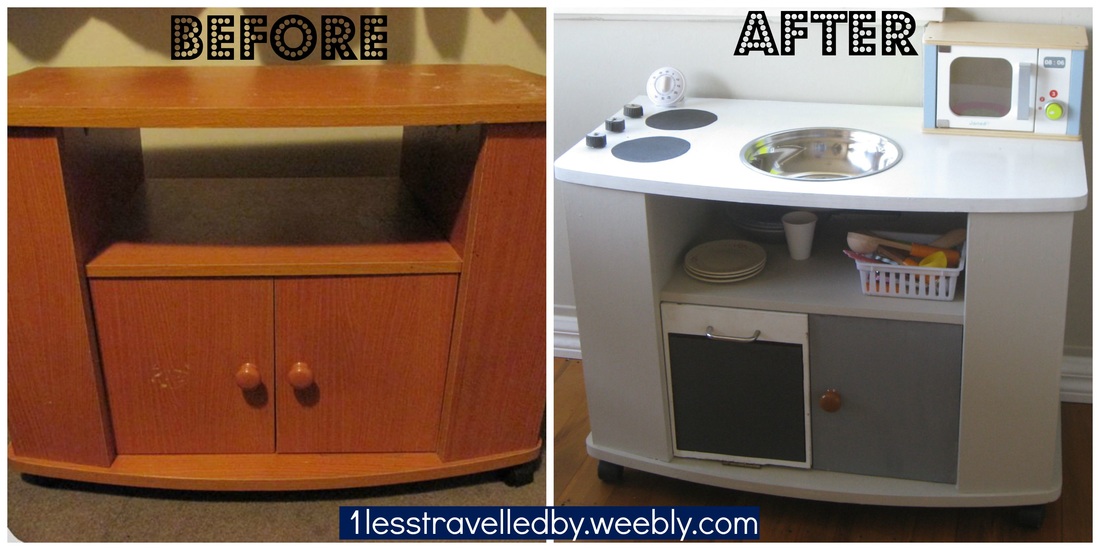 Turning two is a big step and toys suddenly take on a whole new meaning: pretend play! Hooray! We finally pretend play and not just stick things in our mouths. ;) My wee girl loves playing kitchens since about 18 months old. She likes the microwaves and cups with spoons the most. I looked up buying a new kitchen for her birthday and decided there was no way I could afford a $250 toy kitchen. I stumbled across some cute DIY kitchens on pinterest and decided I would make my own. Here is the completed project (without the tap for the sink): 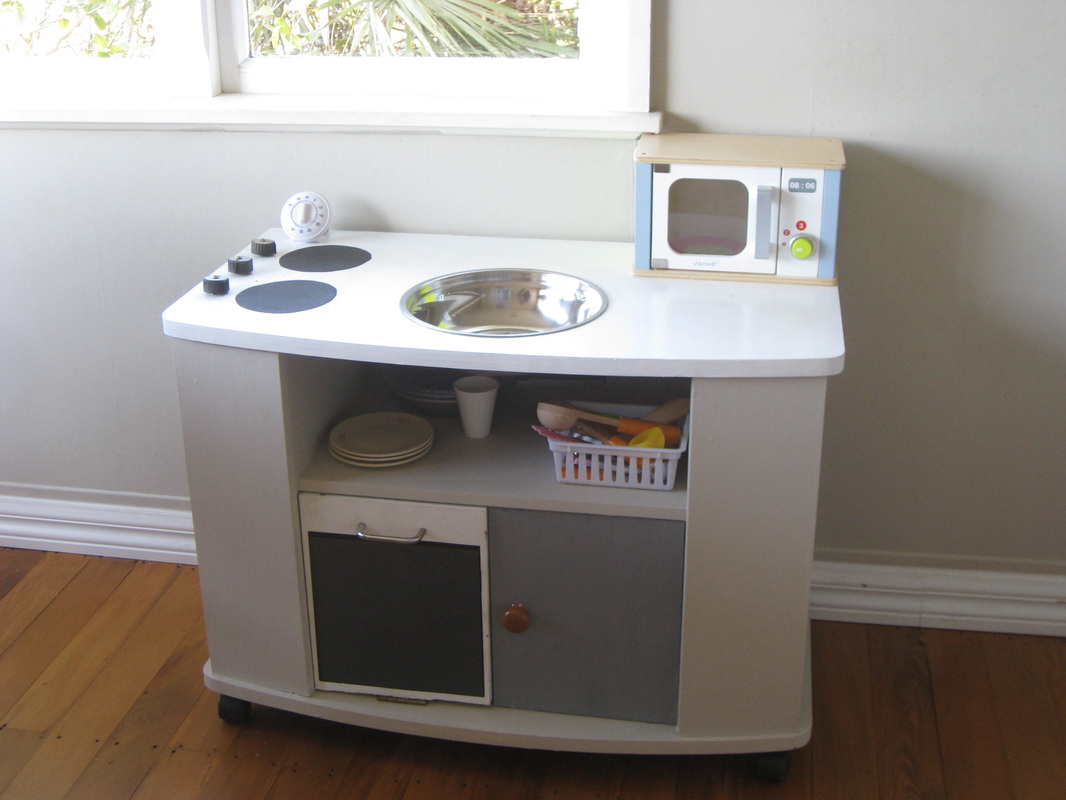 Click on the photos below for a better view of the action.All the kitchen accessories were purchased by friends and family and coordinate really well with our little kitchen. We are just waiting on finding a good(cheap) tap and the upcycle will be complete. Hidden touches - the oven and side cupboards.This TV unit upcycle project is ready for hours of play.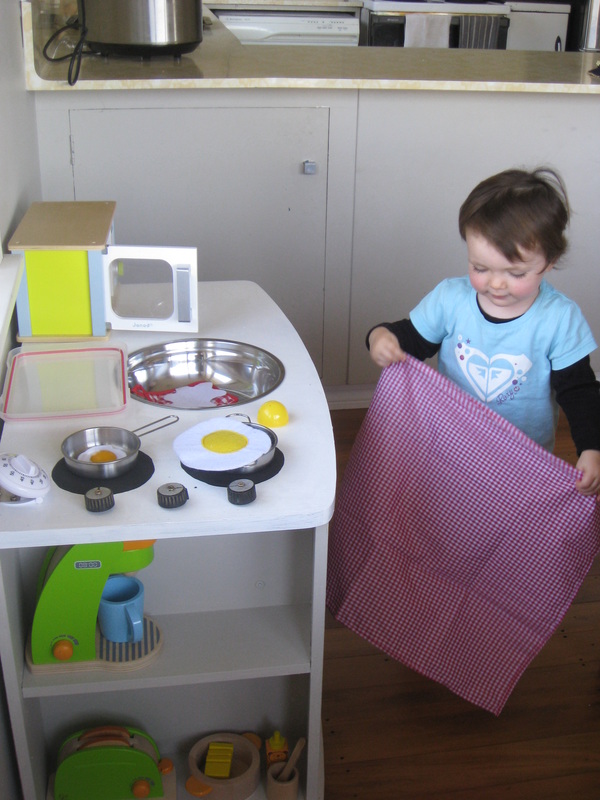 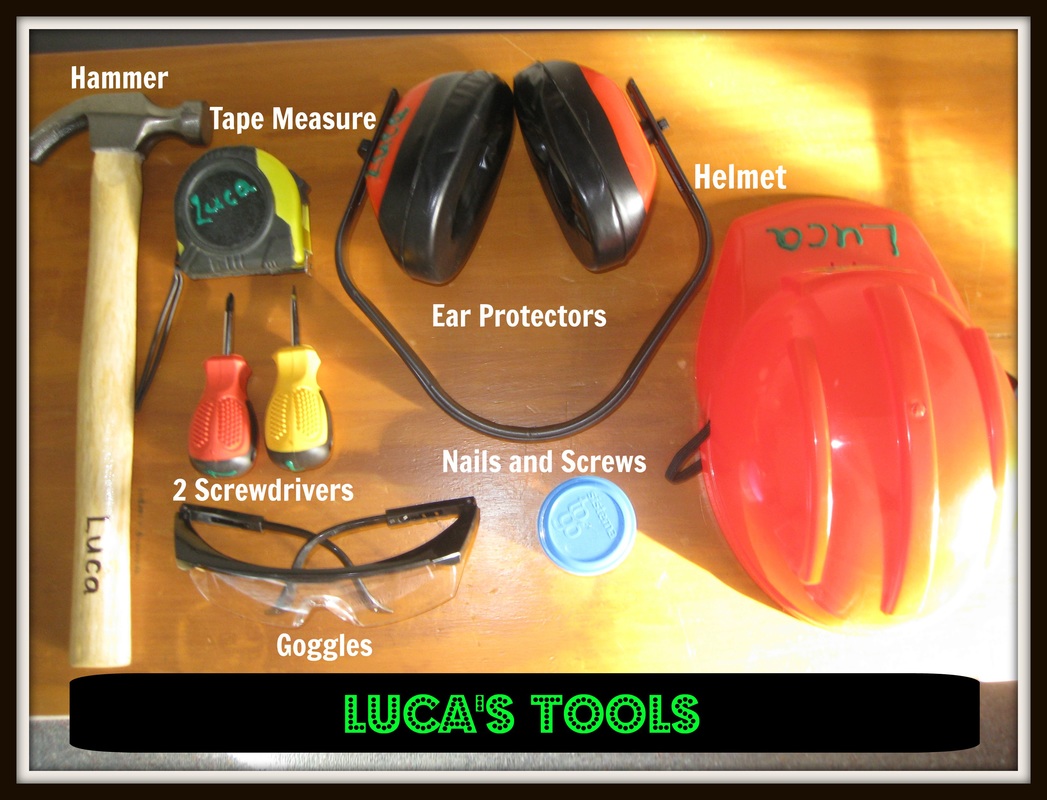 This year many of my friends children turned 2 years old. As many of you may know, being two is a busy time of life and most toys just don't cut it - they don't hold their attention or they aren't stimulating enough. Before going out and buying a new toddler app for your iPad, how about making mini versions of what you use at home. A two year old mind is all about exploring the world around them and copying behaviours they see. I decided for my friend Luca, I would make him a toy that would both stimulate him and encourage him to harness being two into something fun and productive. Now let me preface this... this toy MUST HAVE ADULT SUPERVISION. It has tiny sharp pieces and big smashing pieces. Drum roll... A toddler tool kit just like daddy's one!This wee kit includes:
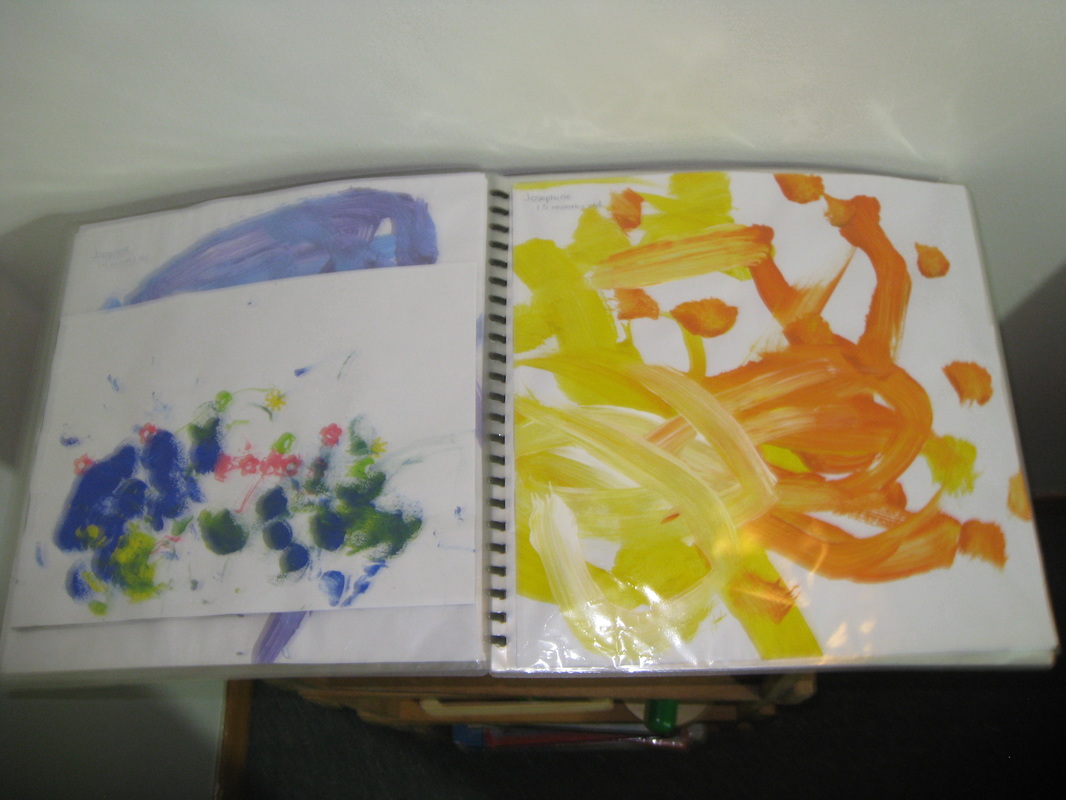
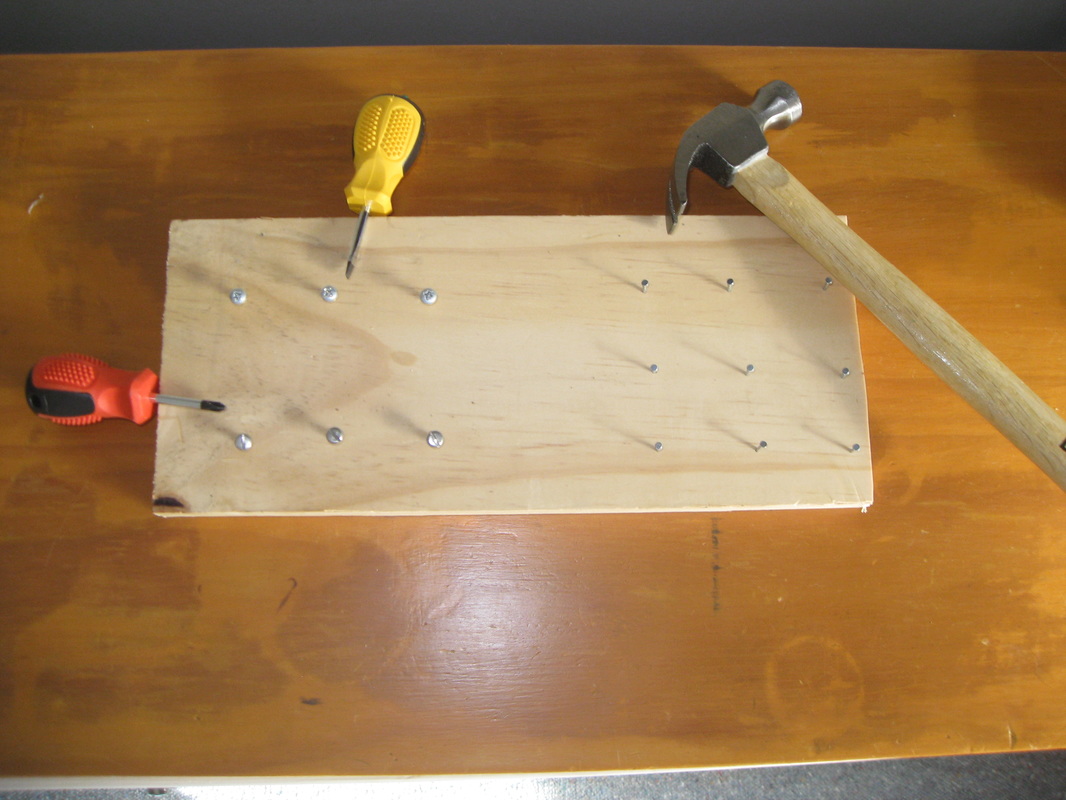
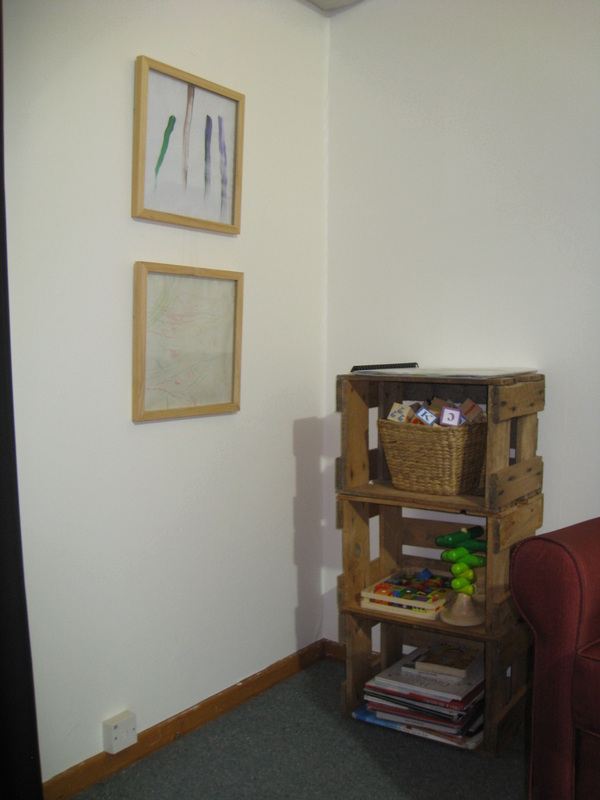
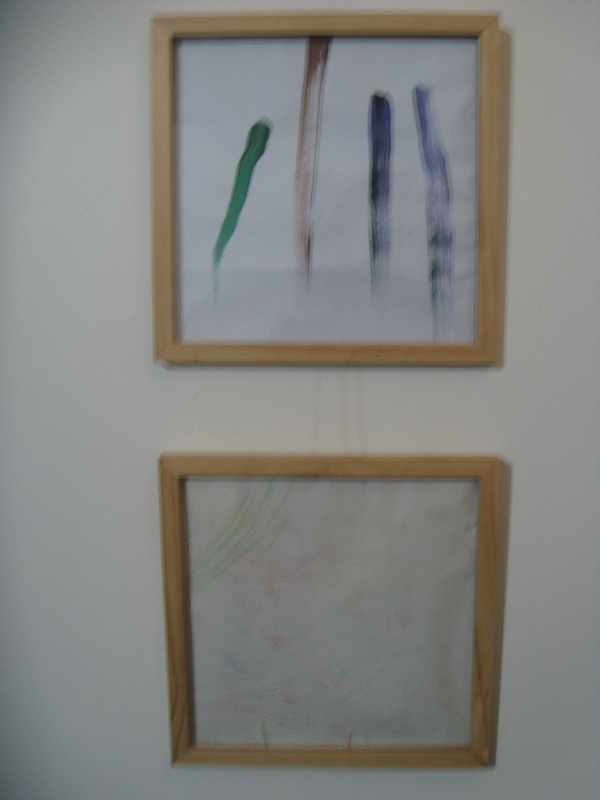
Plastic named hardhat - $4 Ear protectors - $2 Tape measure - $2 Mini- thick handled screw drivers - $3 Goggles - $2 Hammer - $2 Clear plastic case with lid - $8 Piece of wood with screws and nails - scraps from home so the cost was free. I included a little container for extra nails and screws in case they want to make another building board. When my little friend opened his present he went straight to work on the screws with the screwdriver. We have reached the point in our house where we are gathering children's art. It started as one painting on the fridge and slowly turned into a small pile on the desk. We racked our brains on what we could do to display our daughter's art tastefully, simply and located where she could see it. I found a couple square 12"x12" wooden frames and set about cutting her paintings down to that size. We now change out the art every month or so and put the old art in a tidy and easy to display 12"x12" inch folder.
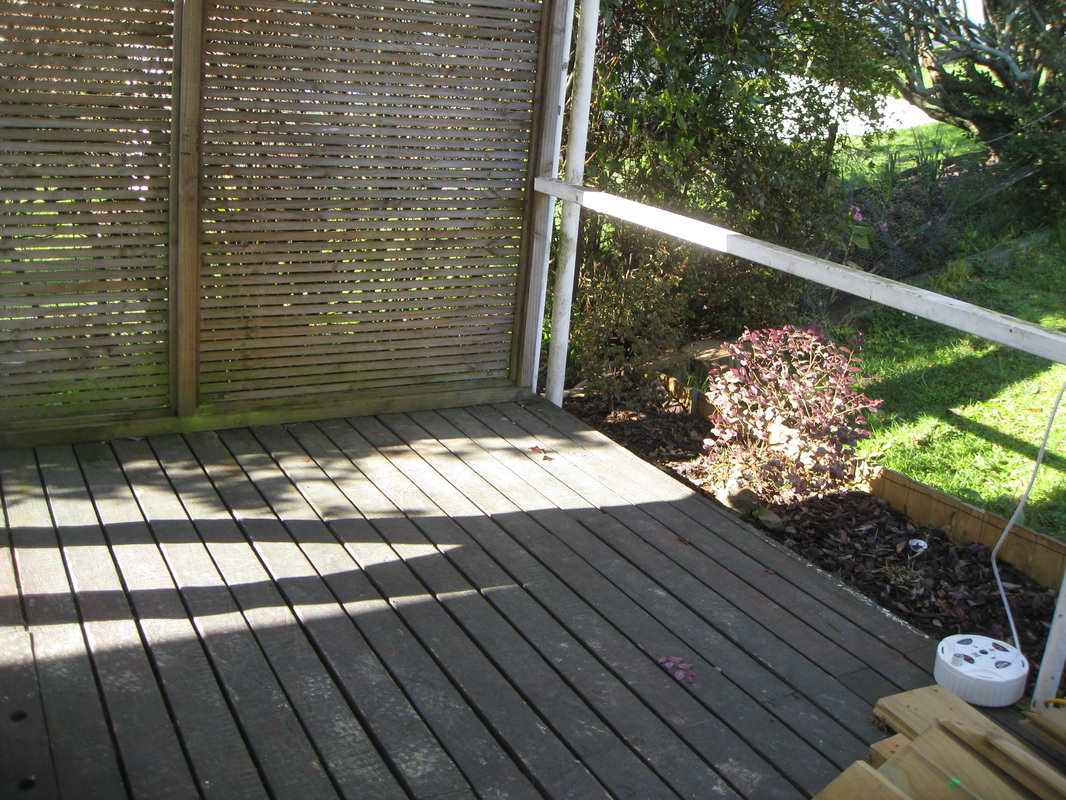
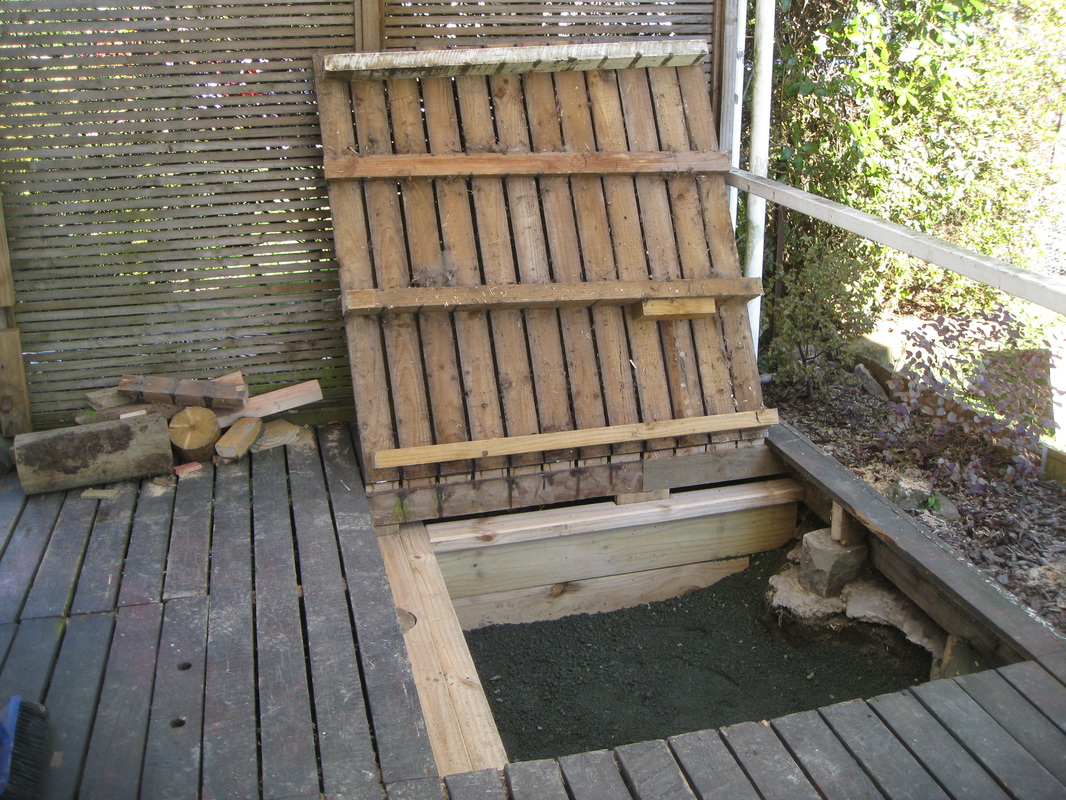
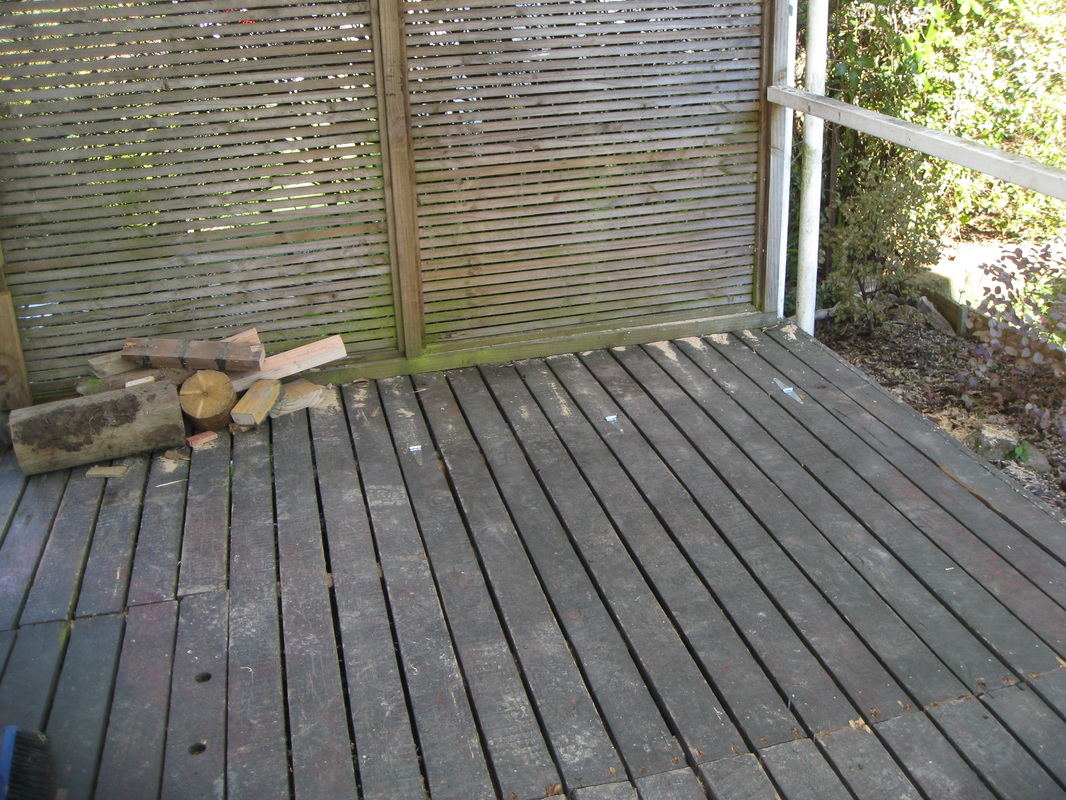
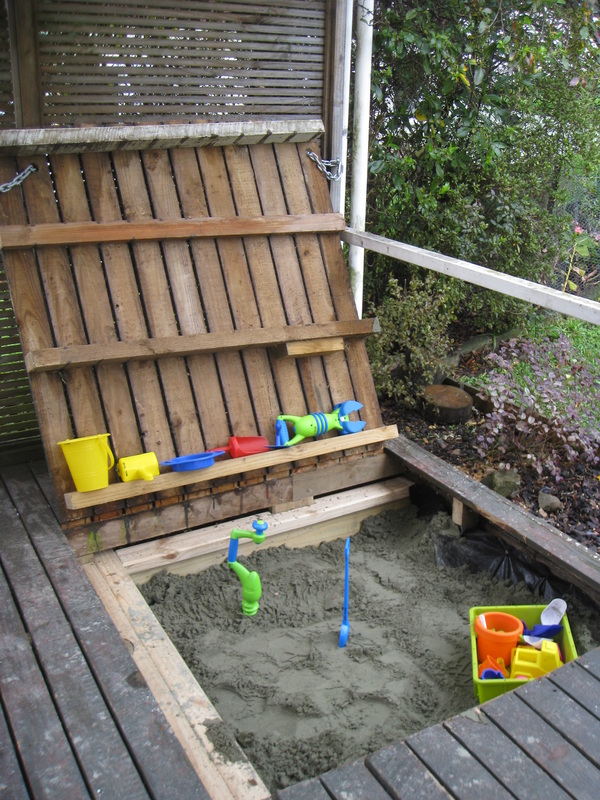
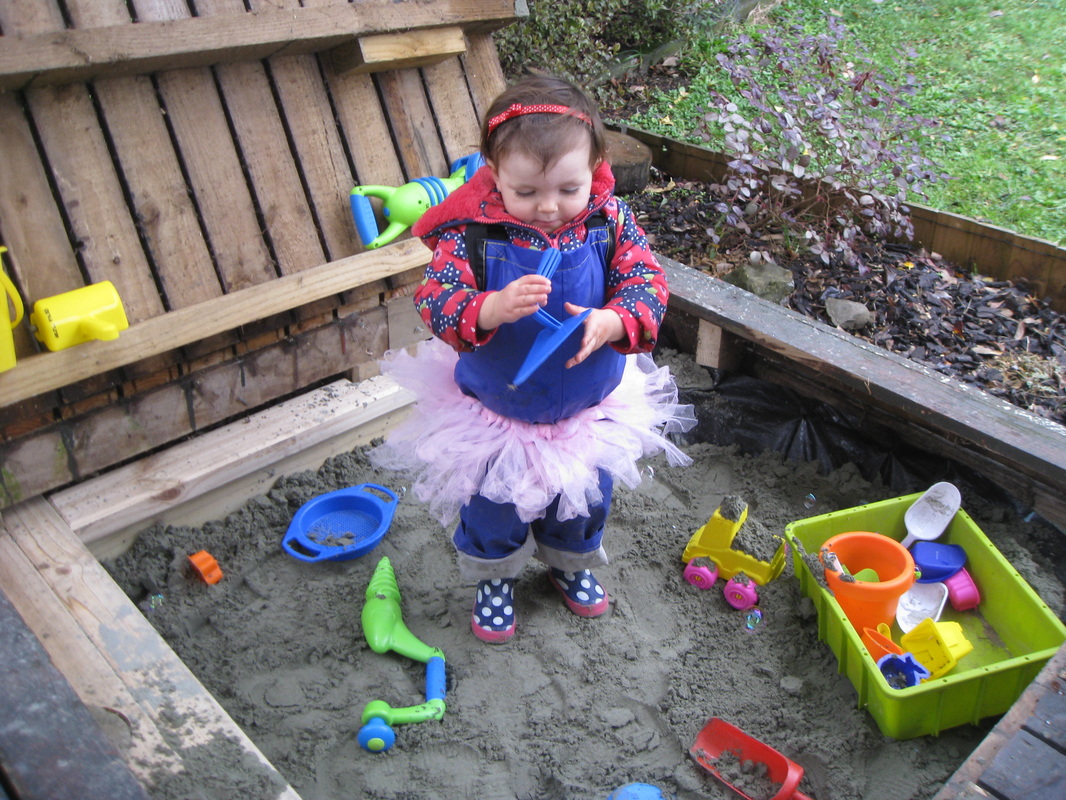
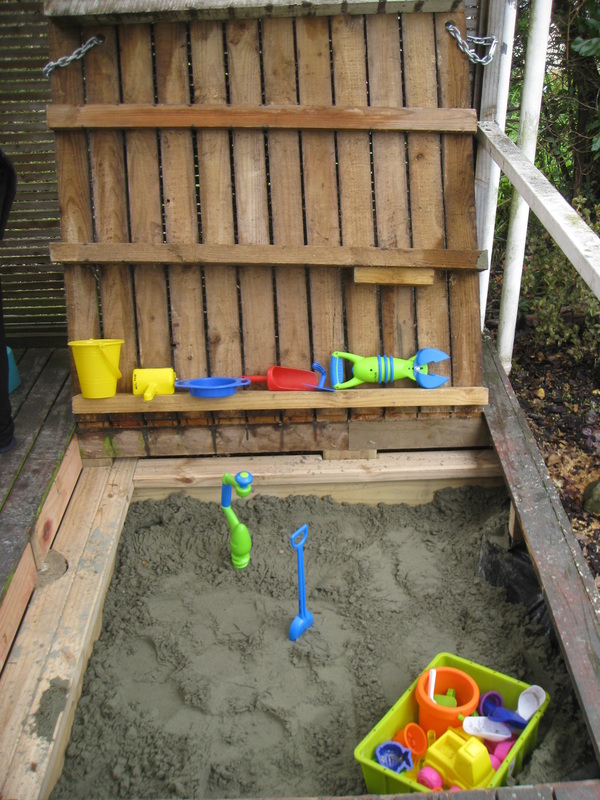
Now updated with more photos: Most children cannot get enough of digging in the sand. We had some hefty criteria for investing in a sand play area. 1. It needed to be covered from the sun and the rain, so that it could be played in all year long. 2. It needed a lid to keep the neighbor cats out. 3. It needed to be big enough for more than one child to play in. We decided a sandpit built into our deck was the way to go. We hired a builder and got the project started.
|
ProjectsI have big dreams, sometimes they come true. Archives
September 2016
Categories |


 RSS Feed
